ORDERS
An order is an instruction to buy, sell, or supply something. According to MSP Hub, orders are generated when products are placed in the checkout process. Orders can contain multiple products, which MSP Hub segregates and sorts as line items.
Orders Generation
To generate an order in MSP Hub, follow these steps:
- Click on the Marketplace icon button located in the top right corner.
- Select Customer and Subscription.
- Choose product.
- Enter the desired quantity.
- Choose the term and billing frequency.
- Add the products to your cart.
- Proceed to Review.
- Click purchase now or schedule now.
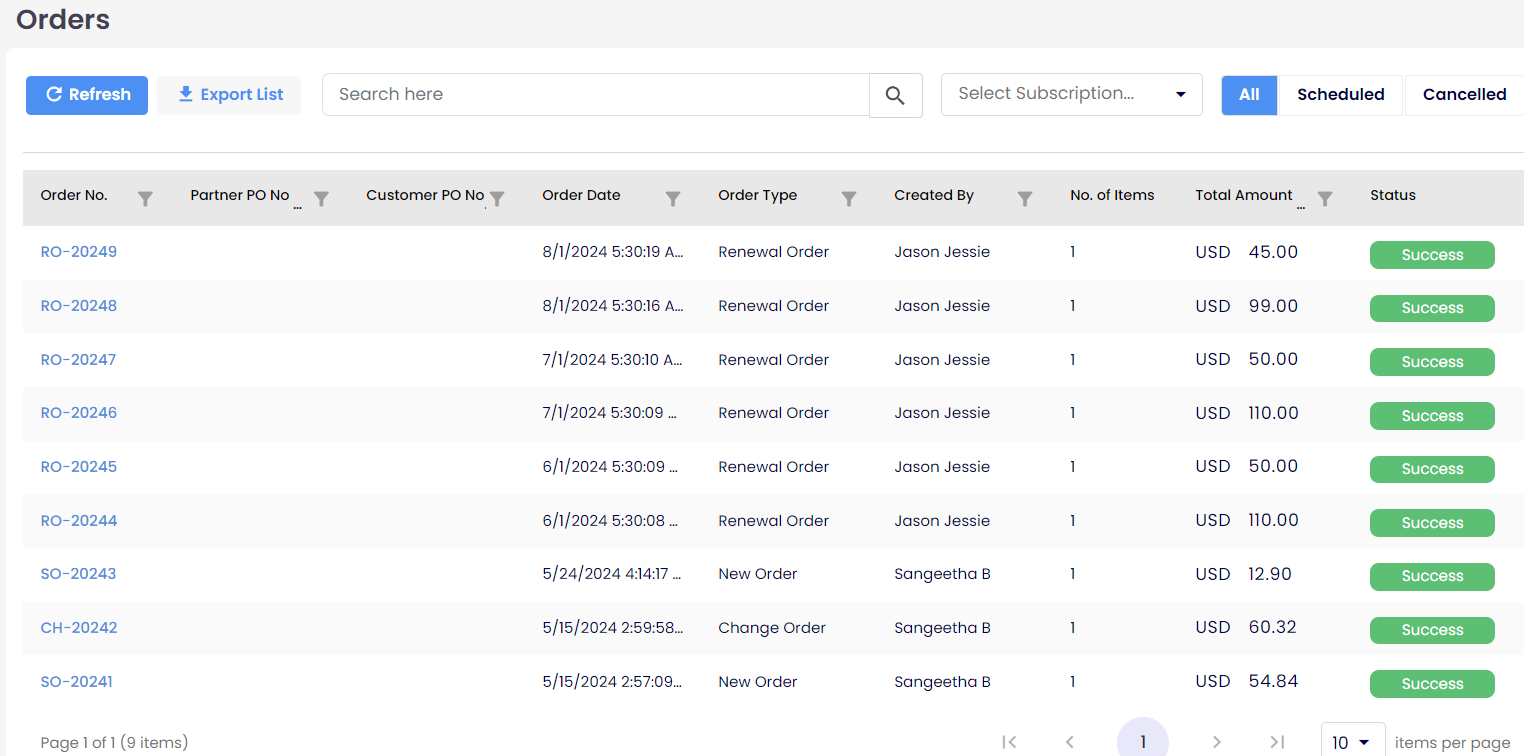
- This action navigates to the Orders page.
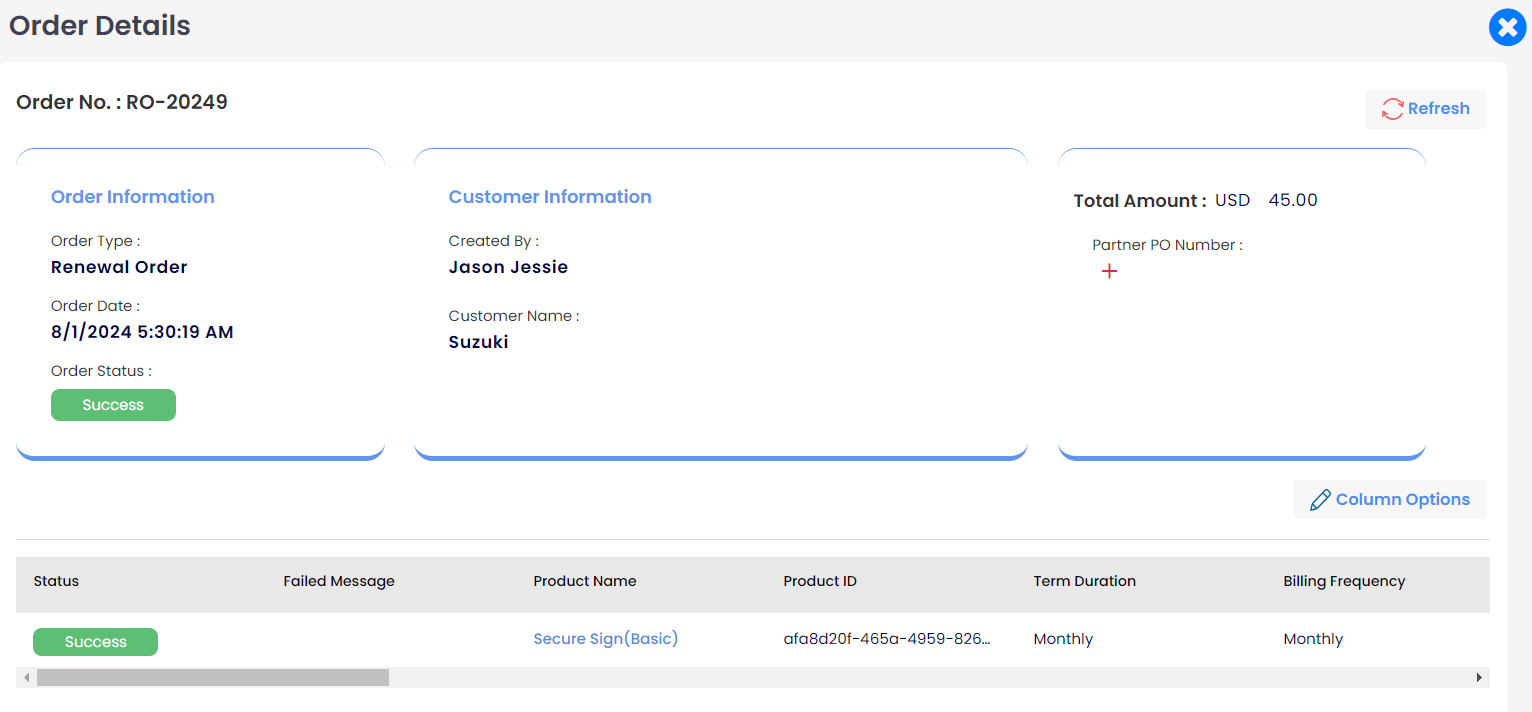
- Click on the order to view the details of the products.
When multiple items are included in an order, they will be displayed as individual items on the Order page, allowing for easy tracking and management.
The Order Details Includes:
- Order number: Varies based on order types (e.g., SO, RO, CH, UO) appended with a unique customer order number (e.g., SO - 202201).
- Category: Defines the product category (e.g., DAAS, Online services, Perpetual, Software subscriptions, Legacy, Add-ons).
- Order Type: Specifies the type of order (e.g., Renew, New, Upgrade, Change quantity, Import order).
- Order date: Date and time when the order was placed.
- Product ID: Unique identifier for each product (e.g., Office 365 - CFQ7TTC0LF8S).
- Product name: Name of the product and SKU ID included in the order.
- Quantity: Number of units of the product.
- Number of Items: Indicates if the order contains multiple products.
- Domain name: Identifies the CSP domain or MSP Hub domain is associated with the order.
- Total Price: Total price of all items in the order.
- Unit Price: Price per unit of each product.
- Extended Price: Calculated price considering pro-rata adjustments.
- Subscription Start & End dates: The period during which the subscription is active.
- Charge Start & End dates: Period for which charges apply.
- Effective days: Number of days considered for pro-rata calculations.
- Order Status: Indicates whether the order was successful, failed, or partially successful.
- Created By: Specifies whether the order was placed by the customer, partner, or their users.
- Provider: Vendor name associated with the product (e.g., Microsoft, MSP Hub).
- Billing Plan: Frequency of billing for the product (e.g., Monthly, Annual, One-time).
- Term Duration: Duration of the product's term (e.g., Monthly, Annual, One-time).
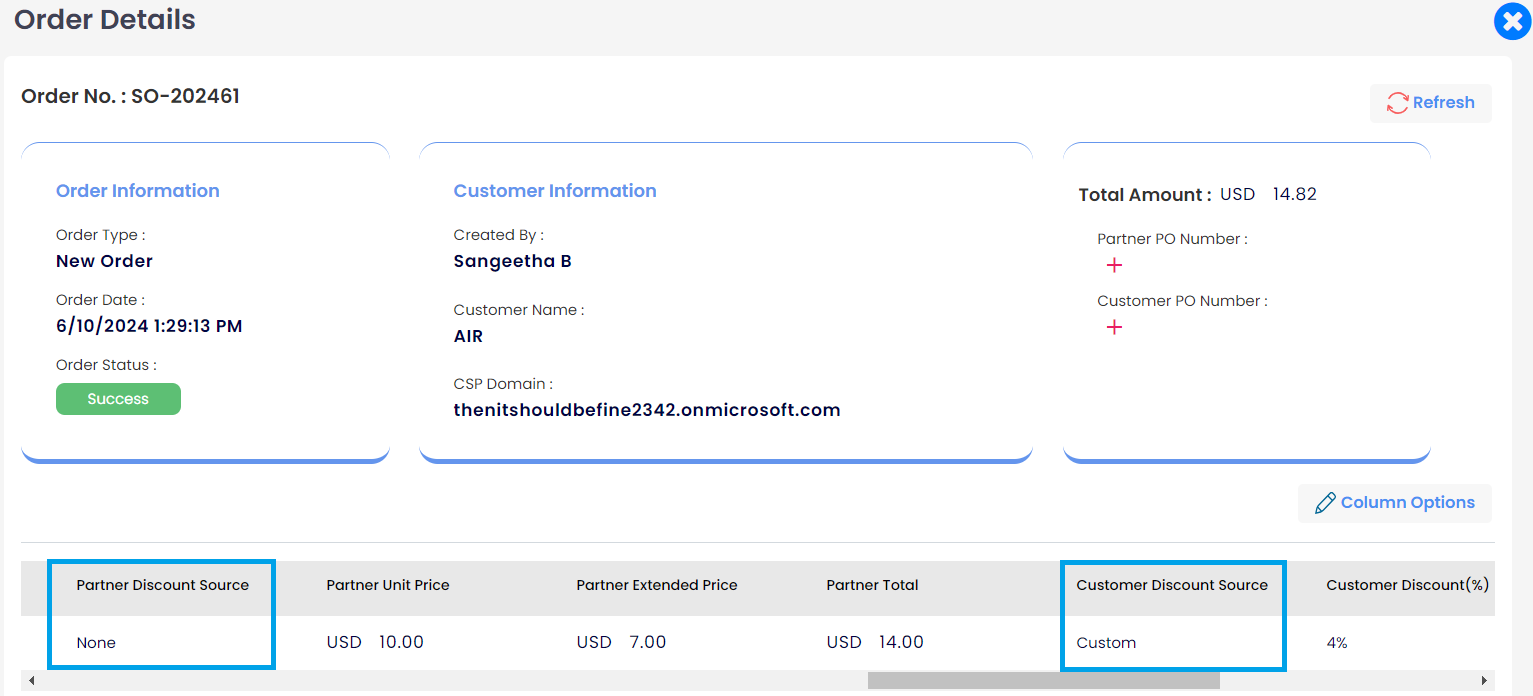
- Discount Sources (For Partners only): Specifies the source of discounts (e.g., Custom, Credit Terms, Discount sheet).
- Discounts: Percentage of discounts applied.
- PO Number: Purchase Order number used as a reference for the order.
- Status: Displays the status of the product order.
- Failed Message: If the product order fails, this message will provide details about the failure.
To view the details of an order, simply select the desired order from the list. This action will provide you with comprehensive information about the selected order, including product details, pricing, billing information, and order status.
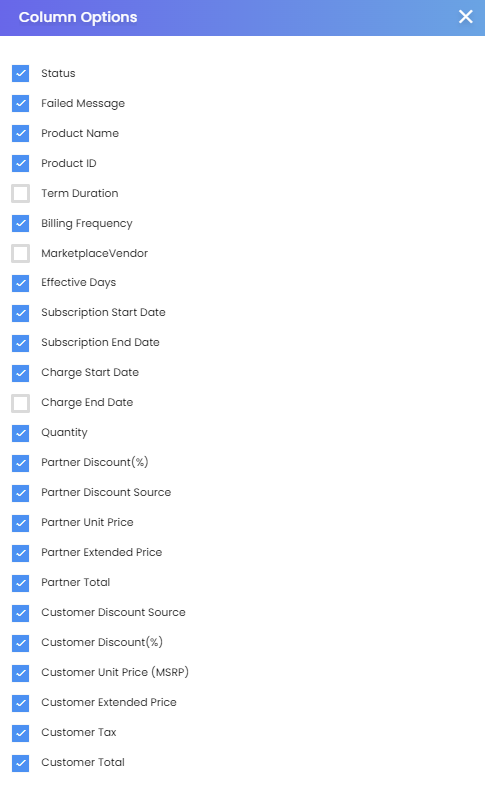
Column Options:
Only selected column options will be shown on the order details page.
Order History
Order history provides a comprehensive record of the product's lifecycle on MSP Hub, including the following updates:
- Sales Order (Initial purchase) - SO
- Change quantity order - CH
- Renewal order - RO
- Import order - IM
- Schedule order - SDO
- Upgrade Order - UO
- Change discount Order - CDO
- Change term Order - CTO
- Force Change Order - FCH
To Navigate Order History
Customer Login:
- Log in with your Customer account.
- Go to the Marketplace and select Orders.
- Choose any existing product and navigate to its Product Overview.
Partner Login
- Log in with your Partner account.
- Navigate to the Customer menu and select Customers.
- Choose any Customer and click on Customer Overview.
- Under Products, select any existing product.
- Click on the Order History tab to view the order history.
Distributor Login
- Log in with your Distributor account.
- Go to the Customers menu.
- Select any Customer and click on Customer Overview.
- Under Products, choose any existing product.
- Click on the Order History tab to view the order history.

Types of Orders
1. New Purchase Order: SO Orders
These are new orders that can originate from any of the previously mentioned services.

2. Manage Renewal - RO Orders
There are two types of renewals: auto-renew and managed renewal.
- When the auto-renew toggle button is enabled, the product will be automatically renewed.
- If you want to make any modifications to the product, the manage renewal section will be available.
- The manage renewal section will only be displayed if the auto-renew toggle is enabled.
- If the auto-renew button is disabled, the manage renewal section will not be displayed.
RO Orders allow products to be continued based on the selected terms and billing frequencies.
Partner End:
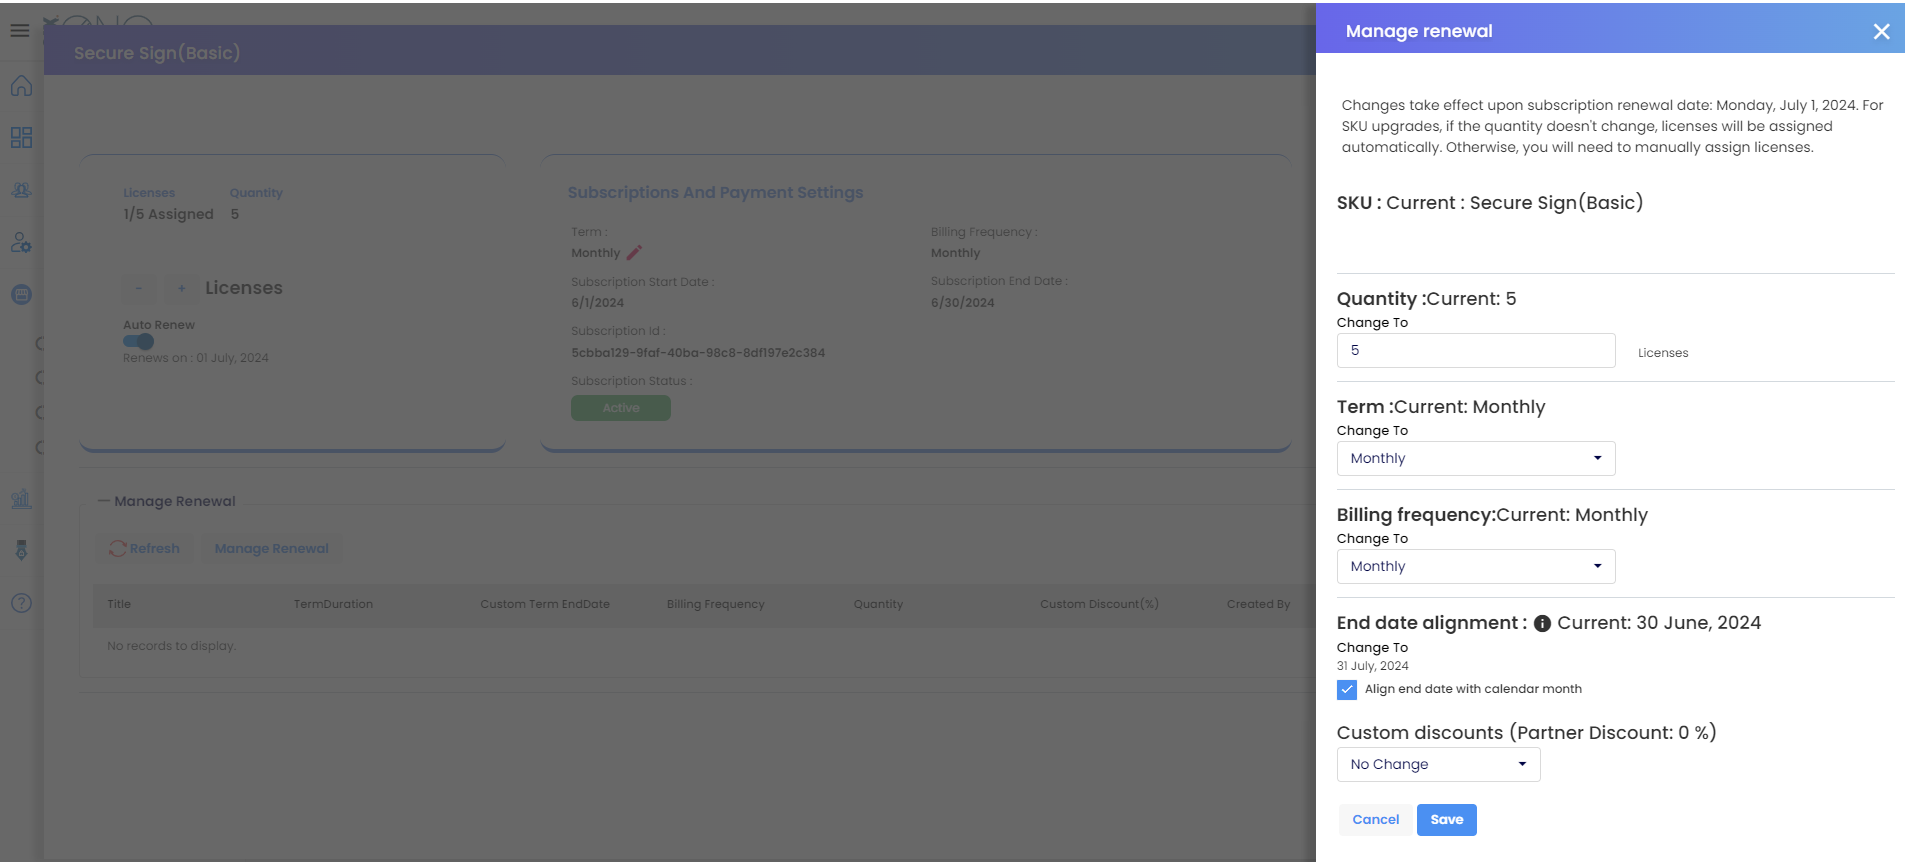
Partners can apply custom discounts for customers. For example, if a product has a monthly term and monthly billing frequency, customers can continue using the same product for the next month by managing the renewal.
For Renewal Orders:
Renewals are based on the initial purchase order. Therefore, the applicable custom discounts are:
- Always
- Custom Date
Customer End:
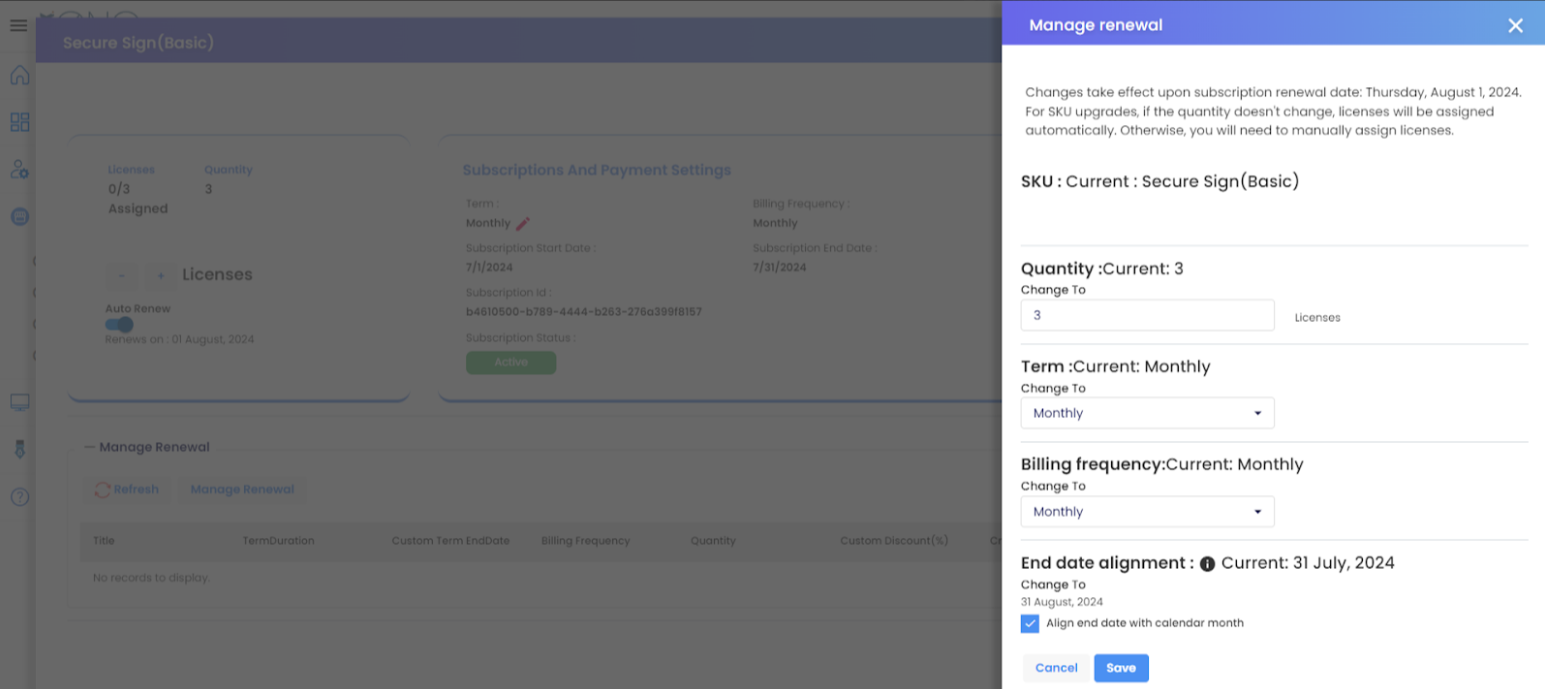
If a customer wants to add a discount, they should request the partner. Customers cannot apply the discount themselves.
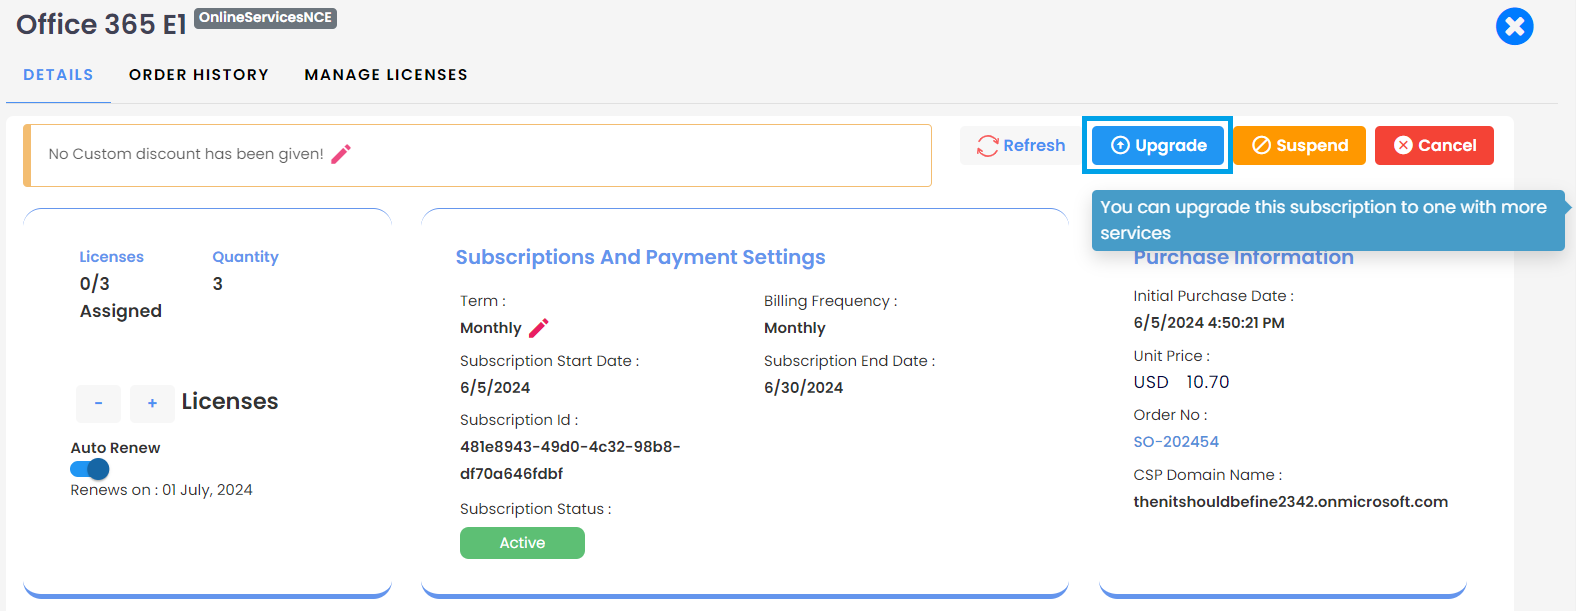
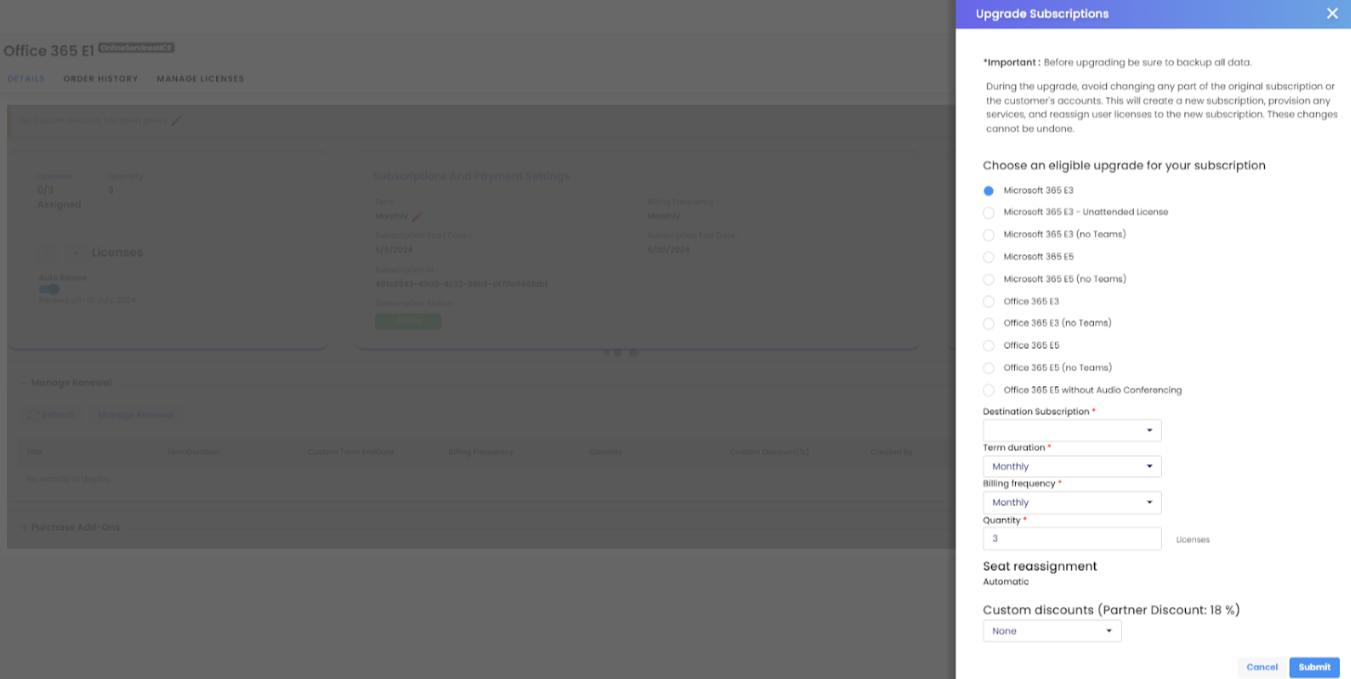
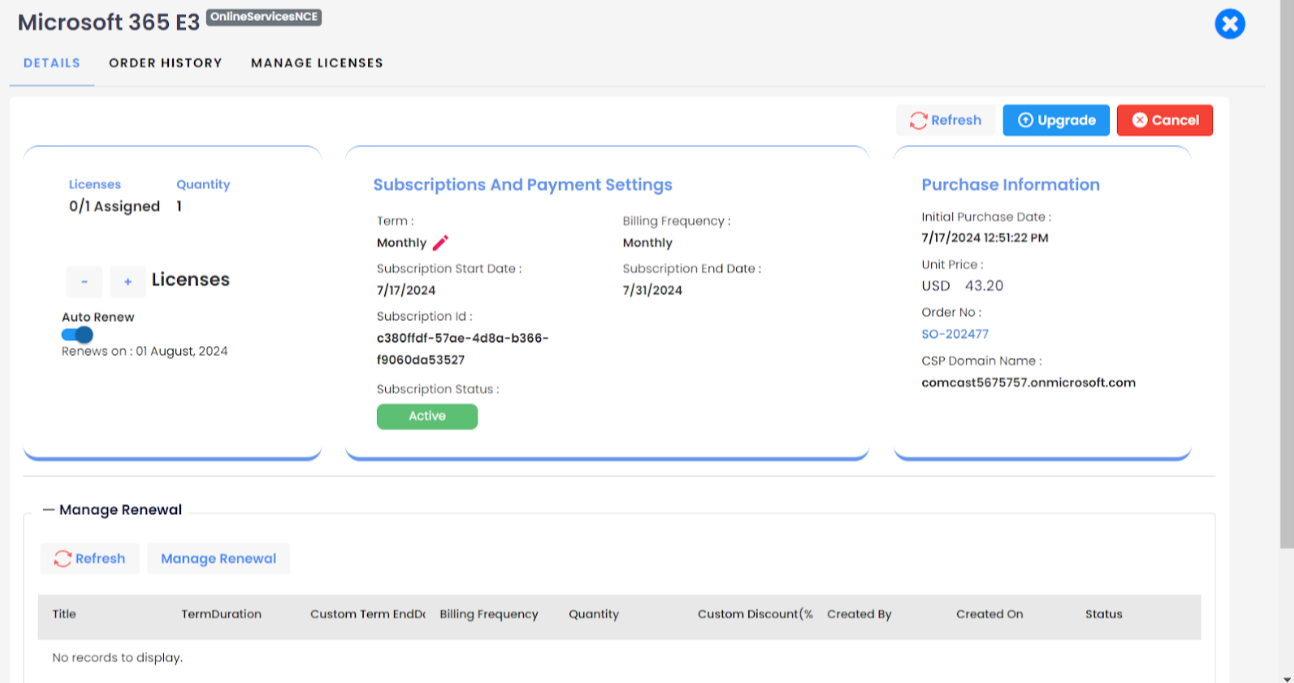
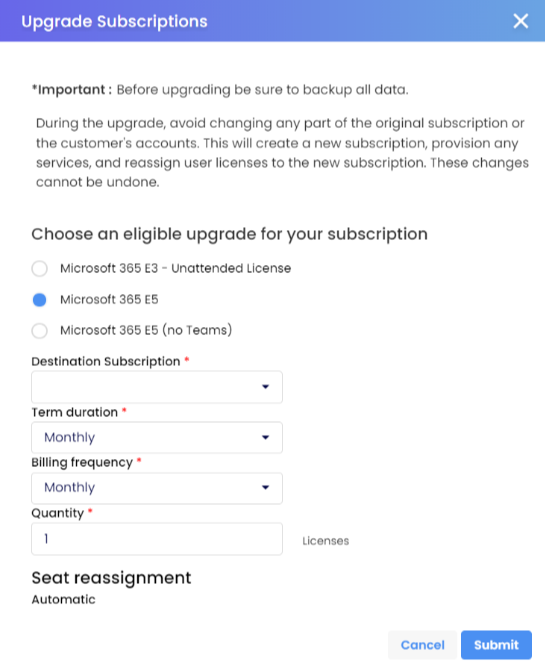
3. Upgrade Order UO Orders allow customers to upgrade initially purchased products. For example, upgrading from E1 to E3. When such upgrades are made, Upgrade orders are created.
Partner End:
Partners can apply custom discounts for customers.
For Upgrade Orders Upgrades are based on the initial purchase order. Therefore, the applicable custom discounts are:
- Always
- Custom Date
Customer End:
If a customer wants to add a discount, they should request the partner. Customers cannot apply the discount themselves.
4. Change Term Order
Note
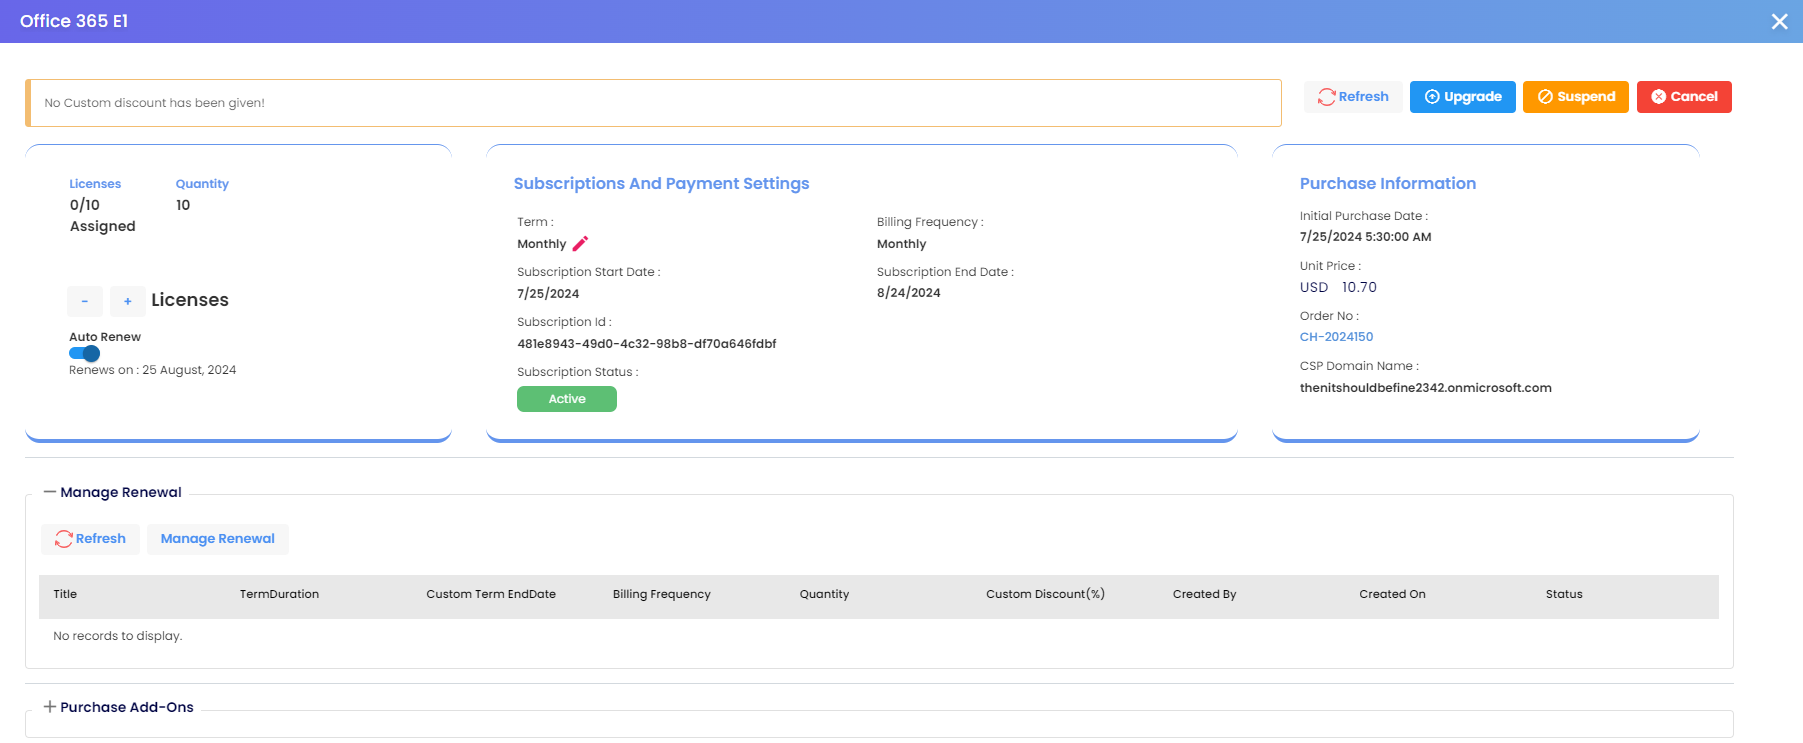
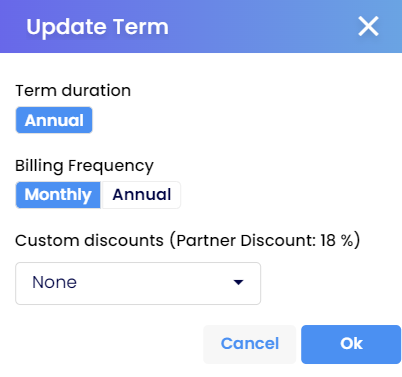
This only applies to products with monthly, annual, and triennial terms. Furthermore, not all subscriptions or products may be eligible for term changes. Additionally, changes to subscription terms may impact pricing and billing, so it's crucial to thoroughly review and confirm any changes before proceeding.
If you wish to modify the term of a product or subscription for a customer, you would typically follow these steps:
- Log in to MSP Hub and navigate to the customer's account.
- Find the subscription or product you want to adjust the term for and click on "edit."
- Depending on the product and subscription type, the process may differ. Some subscriptions may allow you to directly change the term, while others might require cancellation and recreation with a new term.
- Follow the provided instructions to adjust the subscription term. This might involve updating pricing, billing information, or other subscription settings.
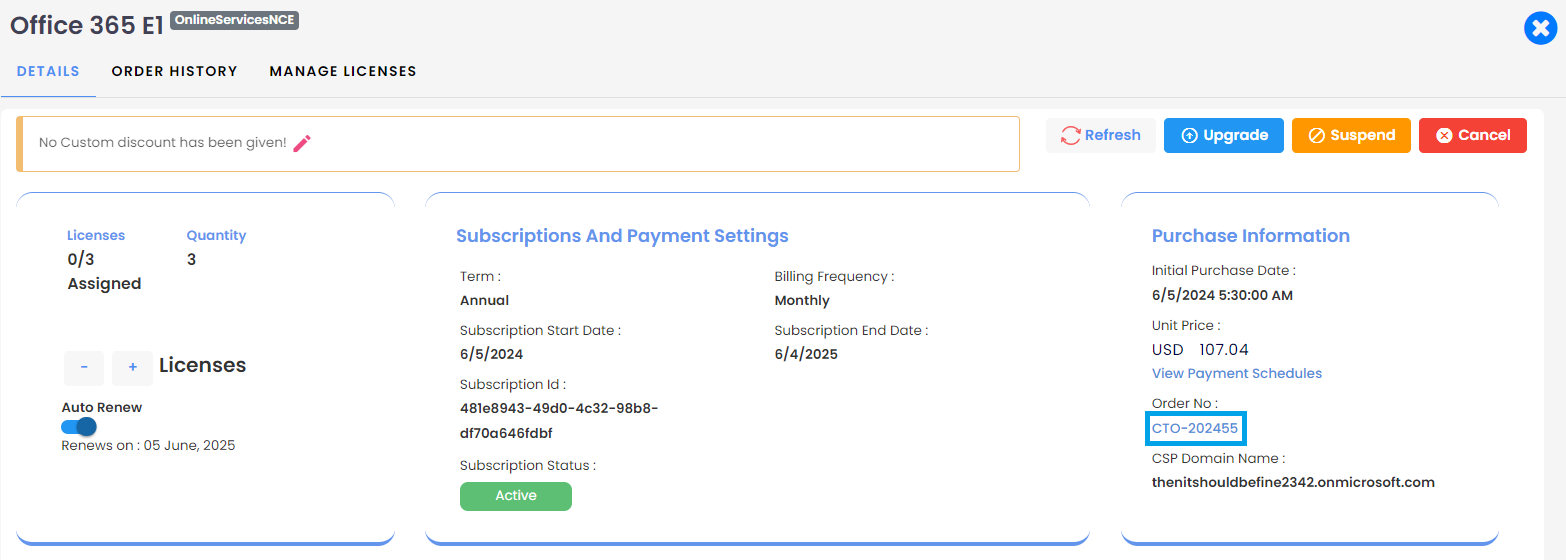
5. Scheduled Orders
It allows customers or partners to plan purchases according to their requirements. These orders can be set up during the purchase process for products, enabling users to schedule when they want the order to be processed.
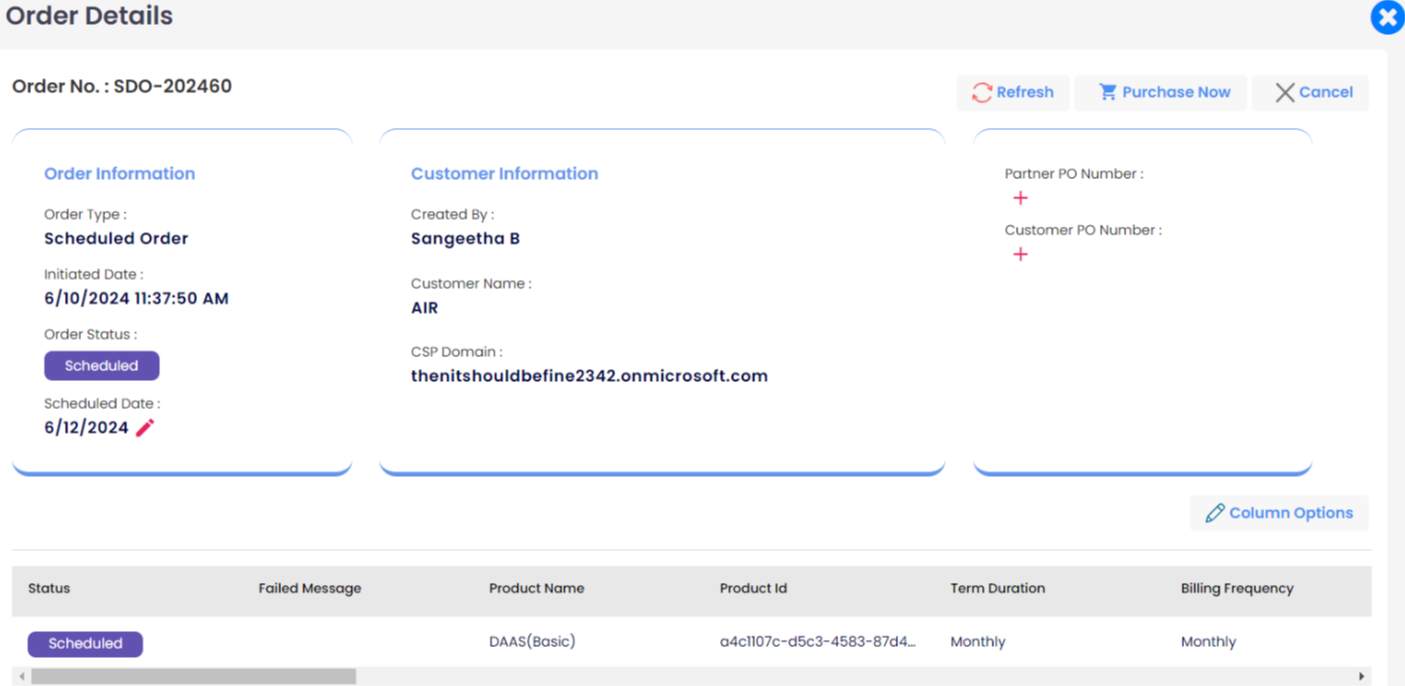
Partners or customers can adjust the schedule of an order by extending the current scheduled date. They can do this by editing the "Edit Scheduler" field associated with the order.
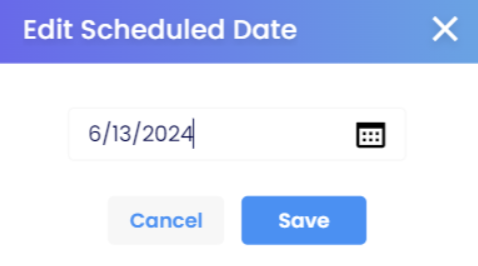
Once the schedule of an order is modified, both the partner and the customer will receive an email notification informing them about the extended date.
6. Schedule Change Order
Both Customers and Partners can schedule changes in quantity for Online Services, Add-Ons, and Legacy Products. Scheduling must be done before the product's renewal date.
Example: If products are end-date aligned, the scheduled renewal can be done until the last day of the month.
Steps to Schedule Change Quantity:
- Login to MSP Hub: Use either a Customer or Partner account.
- Select the Product: Navigate to the specific product you wish to adjust.
- Click on Change Quantity: Select the product and click on the "Change Quantity" button. Adjust the quantity as needed (increase or decrease).
- Enable Scheduling: After adjusting the quantity, enable the "Schedule" button.
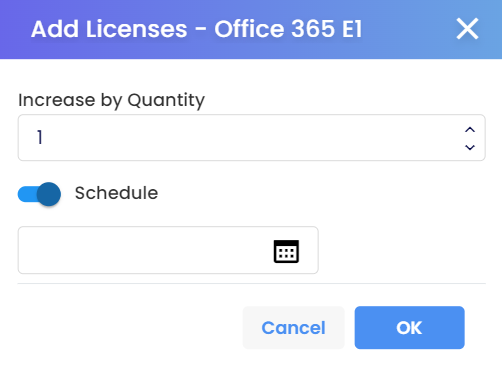
Select Schedule Date:
Use the date & time picker to choose the desired schedule date.
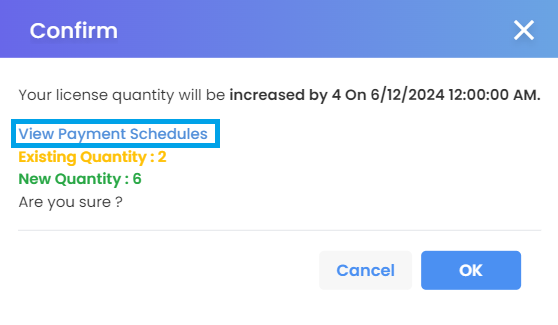
Review the Scheduled Payment view to verify the pricing.
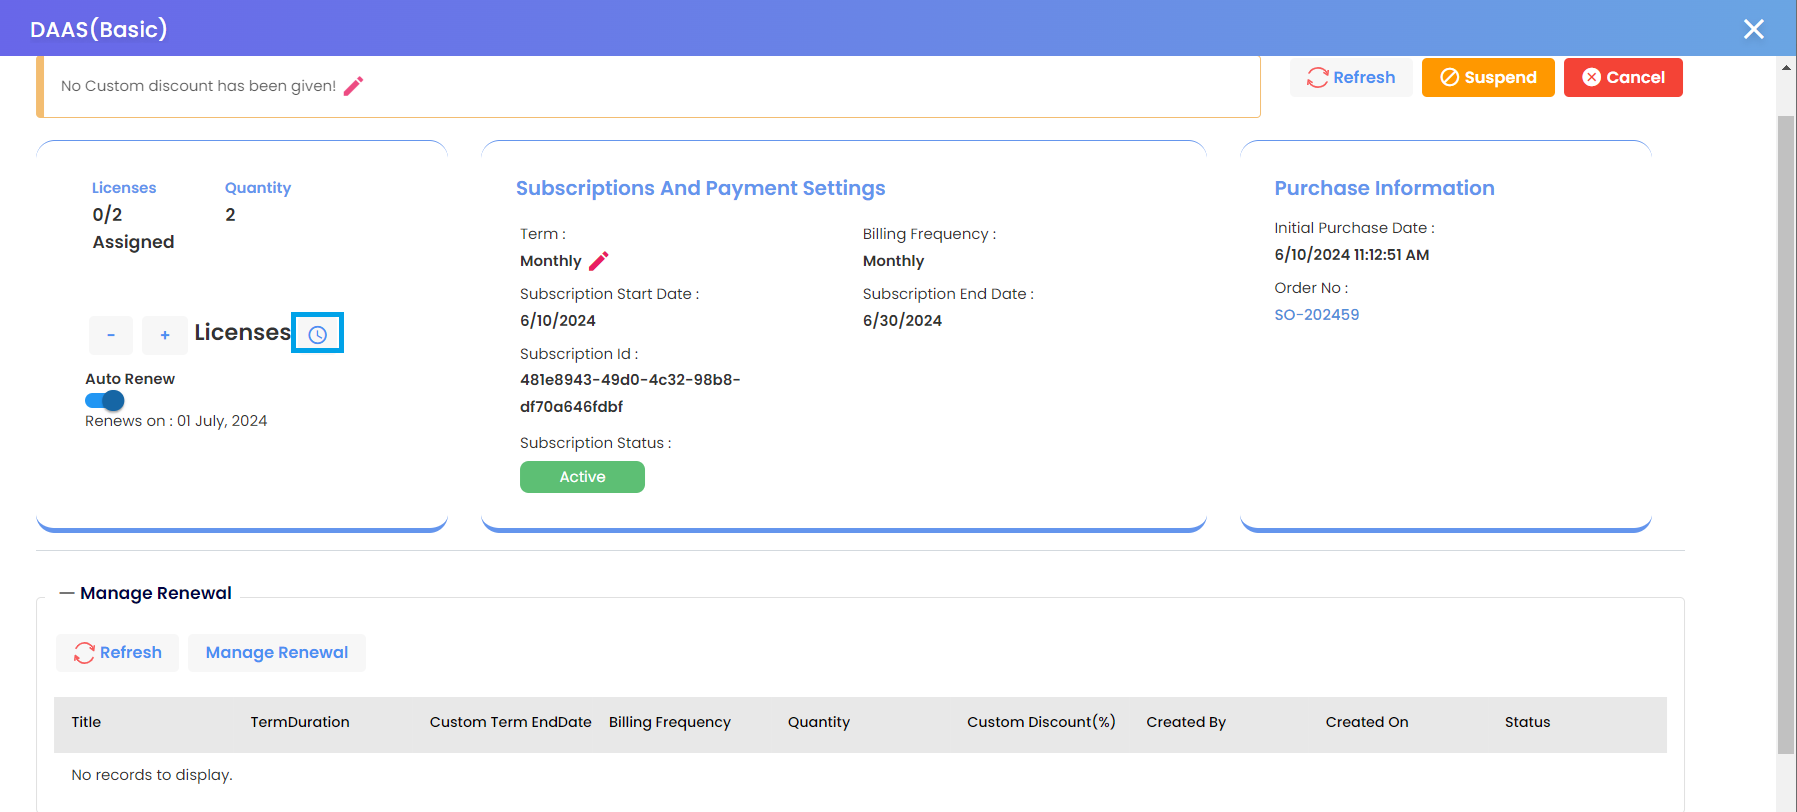
Once scheduled, the Order status will be displayed as 'Scheduled.'

Discount Source
Credit terms, discount sheets, and custom discounts are available as discount sources, and they can be viewed on the Order details page, and accessible to partners in their logins. These sources provide various discounting mechanisms:
Credit terms: Credit terms consist of percentage slabs offered to customers based on their customer type. Partners can assign these credit terms to their customers, granting them discounts accordingly.
Discount Sheet: A discount sheet is a predefined set of discounts provided to customers based on certain criteria, such as volume purchases or special promotions.
Custom Discounts: Custom discounts are specific discounts applied manually by partners to individual orders or customers, offering flexibility in discounting based on unique circumstances or negotiations.
